Friday, October 30, 2009

A thank you card

And my second card for the evening is this thank you card I made to say thank you for a wonderful blog candy I recieved recently. I can now safely post it as I know it has arrived :) I am entering it in to Crazy4challenges this week where the challenge is to use 3 geometric shapes - I have a square a Circle (almost) and a rectangle or two so I think this fits the bill.


Sorry for the picture quality I took it on my desk at work just before posting it as I realised I had forgotten to take a piccy at home.

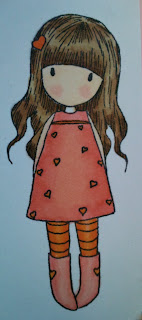
Here is a close up of the image used - she is one of the Gorjuss Girls


Card Recipie
Papers - Given to me by steph think they are stampin up papers?
Image - Gorjuss Girl
Sentiment - Basic Gray
Gems ribbon and flower from stash
Coloured with Copics
  

A Birthday card using Sketch Saturday

Hello ladies how are you all - sorry I have been absent for a while It has been a bit of a busy week this week. However it is now the weekend so bring on the crafting and blog hopping :) YAY
Here is a card I made using the Sketch Saturday sketch for this week only just in time but in time none the less.  I have to admit to using Simmones card quite heavily as my inspiration for this (Simonne is on the Sketch Saturday design team you can see her card here)

This is the sketch we were given


And here is what I did with it. The papers are from Basic Gray and the image is from Victoria Case. I think this image is perfect for the male birthday card love her. I coloured her with copic markers and then mounted her on to black paper and then the basic gray paper. The sentiment is from Woodware I love these sentiments they are so useful - I think I need more though :) as well as papers, gems, brads, copics.....................


Here is a close up of the image I can't decide if I like doing the highlights using my Souffle pen or just by leaving the white areas hmmmmm think i willhave to keep trying till i can choose my favourite.

Hope you like my card xx

Sunday, October 25, 2009

A little shaker treat box

Good Afternoon everyone I hope you are having a wonderful Sunday I have been very busy today, I am off to do some more crafting in a moment but i thought i would share this little creation with you.

This is my first creation for DewDop crafts as one of their Digi Design team members. It is a little box for my mum for her birthday, she loves all things gothic and so I thought this image would be perfect for her. The image is called the Halloween Pixie and can be found at dewdropcraftz along with many other gorgeous digi and rubber stamps.


I made this box using a template I found on bettys-creations it is perfect for all those little Halloween goodies :) -
Here are the instructions for making the box;

1. Using the template draw the box design on to your chosen DP (you need draw around this twice - side by side - in order to get the full box shape)
2. Cut out the template and score the lines where necessary
3. Cut an oval shaped hole in the front of the box - this will be your window
4. Print your Halloween pixie out (don't forget you can buy this here) and colour her using your chosen medium
5. Print a spider web on vellum
6. Cut the velum and Digi image so that they are just larger than the oval you have cut in to the front of the box (it is important not to make it smaller or it wont work)
7. Stick the vellum down with Double sided tape
8. Get some double sided foam tape and stick this all around the outside of the vellum making sure you can't see it when you look though the front window. It is also important to make sure there are no gaps otherwise the shaker bits will fall out.
9. Now you need to get something for the shaker elements I used black sequins and silver stars - place these carefully on the vellum in the middle - you don't need loads so don't overdo it or it will overtake the image.
10. you now need to remove the backing from the double sided foam tape and stick your image down on to this - make sure the image is centered and then push firmly down on the tape.
11. Now all you need to do is stick the box  together - I used double sided tape for this and voila you are done - just fill with your favorite treat or present.

Here are side views of my shaker box


I used a Wallpaper sample to make mine - I am loving these they are brilliant for crafting and come in so many beautiful designs - as it was quite thin I reinforced my box on the inside with plain white card - if you have a favourite paper you want to use you can do it this way too - simply cut out some white (or coloured) card to size and stick down with double sided tape before putting the box together.

I hope you have found this elpful - I haven't done a tutorial before but I thought you might like this one xx

Tuesday, October 20, 2009

entry to sketch saturday, Creative Inspirations and Stamp Something :)


Hello Again, see I told you I had been making things - Here is a card I made for someone at work, he asked for a more grown up card for his daughter which i found hard as like many of you i am used the the cutesy stamps. For this card I followed a sketch on Sketch Saturday which is shown below along with my interpretation.


I used a See D's flower stamp - I have had it since i first started crafting and only used it twice but i think it is pretty and suitable for the more frown up cards some people request everynow and then. I coloured it with copics and then used Stickles to give it a bit of sparkle (this was the challenge on Stamp Something this week)

Believe it or not i didn't use ANY design papers - not crafting ones anyway - this card is actually made using wallpaper samples - LOL - I saw them when I was out shopping and couldn't resist it I have never made one with wallpaper samples before but there are so many beautiful ones out there i think I may make some more - I had to use a stronger glue but apart from that it worked fine. Finally the last challenge I entered was Creative inspirations whose challenge was 'family' This card is for my collegues daughter so this counts :)


Card Recipie
Papers - Wallpaper :)
Coloured with Copics
Ribbon from stash
Gems from stash

A christening card

Good Afternoon Ladies I hope you are well. Sorry I haven't posted anything in a while I have been making things just not had a chance to post them until now :). This is a christening card I made for a work collegue - I didn't really have any christeningy images so I whent with this Bear which is a digi stamp from DZ Doodles.


The papers are actually from the forever friends Gift wrapped A4 collection which I love it is so versatile and great quality cardstock. I mounted this on to some plain light green cardstock from my stash and printed out the sentiments on my PC. The bear is coloured with copics - he would have looked better but i ran out of my E31 so I couldn't shade it as well as normal GRRRR i know what i am buying on payday. The ribbon is from my stash.

Here is an inside view of the card - I got the sentiment online;


I used some scalop scissors on the border and some little gems to decorate - the paper again is the forever freinds one.

Card Recipie
Papers - Forever friends and cardstock from stash 
Image - DZ Doodles
Charm - a gift from a freind
Ribbon from stash
image coloured with copics and highlihted with a sakura souffle pen (altough i dont think it looked right on this one) 


Tuesday, October 13, 2009

A new Christmas card which fingers crossed will be published

Morning ladies hope everyone has had a good morning so far. I was busy last night creating a card with this gorgeous 'not even a mouse' image from Mo Manning to send to a magazine to be published. I emailed them on Sunday with some of my card designs and they told me if I can make and post them a Christmas card before Friday then they will publish it in the next edition of making cards Magazine so here it is :)


I made the card using papers from Forever friends ands an image from Mo Maurie Manning, the sentiment is computer generated and I have also mounted each sheet of paper on to Silver mirri card - my absoloute must have for Christmas cards I love it.

Here is a close up of the image itself coloured using Copics.


Sunday, October 11, 2009

Another challenge - this time to Get Sketchy

My final post for the evening is an entry to Get Sketchy I used the sketch that was given but not the bonus of using watercolours (only because I didn't see it I must be going blind though because it was in Big red letters lol)

This is the sketch we had to follow;


And here is what I did with it - I rotated it  180 degrees


Card recipe

Papes - Free last year in Making cards magazine
Misc - Ribbon and gems from Stash

My Entry to Our Creative Corner for this week

I think I am on a roll tonight for postings i hope that my posts don't get ignored though cos I am posting so many lol. This is the first time I have entered this challenge, this is the sketch we had to follow;


And here is what I made with the sketch.


I used the free papers and image from Making cards Magazine October edition and Jazzed it up with some Stickles glitter and used some ribbon i bought from Malaysia on Ebay I do love Ebay.

Card Recipe
Papers - Free in Making cards
Image - Free in making cards
Misc - Stickles glitter glue and ribbon from Ebay 

Entry to Roses on Paper (DT), Crafty Calendar challenge and Sketch Saturday

Evening ladies - phew a lot of posts today, I didnt make all these today though I have been making them from Friday evening until just now. This card is my entry to the  Belles and Whistles  Design team call, I figure you gotta be in it to win it so here goes. 

This card is an entry in to three challenges, the first is the Roses on paper challenge which is a combined challenge blog for Roses on paper and Belles N Whistles. The challenge this week is to use the Autumn colours Orange, Brown and Green. We could use a sketch from another blog so I used the one from Sketch Saturday which i have shown below. I think I will be keeping this sketch for some of my Christmas cards I love it.


Here is what I did with the sketch - This card will be being sent to America tomorrow, It is a birthday card for a fellow crafter who is in a Birthday club that I set up.


I used papers from Basic Gray - I am not sure what the collection is though i completley forgot to write it down doh! The images are from the greeting Farm sooo cute aren't they. I coloured these using Copic Markers, I got the effect on the socks using the colourless blender i just coloured the socks with G17 and then dapped the colourless blender in small areas all over the socks to create the pattern, this is the first time I have tried this technique on an image I think it turned out pretty well :)
I made the flowers myself using a little papermania flower punch, I punched the flowers out on matching double sided paper and used tweezers to curl the edges, i then layer them alternating the colour of the DP on the top and finished them off with some little flat back gems (which i actually bought to go on my nails as nail art but figured they are perfect for card making - if any one wants some all you need to do is go on ebay type in nail art and they will come up they are from Malaysia and cost about £1.50 for hundreds of them in a colour wheel including postage - BARGAIN)

 
Here is a Close up of the Anyas I love these pretty ladies they are perfect for any type of card.

Card Recipe
Papers - Basic Gray
Images - The greeting farm
Gems - Ebay
Ribbon - received from a blog candy :)
Sentiment - Woodware
Coloured using copics 

A Lauren Meader Box - Card Couture

This is my second attempt making this box I much prefer it this time however I am still having trouble keeping the insides stuck they seem to keep pulling away think i will have to use extra strength glue next time :) what do you think ?


I am going to use this to put my stamped images in and I have decided I will be making some at Christmas with little cards in to give to people as a present just need to master the inside slots first. 

Crafts 4 eternity

Another card from me for this weeks Crafts 4 eternity - it's another Christmas one I need to get my stash up so i can send them off to woodgreen - don't forget it isn't to late to enter my blog candy just scroll up to find out more xx


Here is a close up of the image i colored her with copics she is so sweet isn't she. I used papers I received from a blog candy I won they are K&Co I love these colours - not the normal Christmas type papers but perfect for a Girly Christmas papers.


Card Recipe
Papers - K&Co
Image - Sugar Nellie

Coloured with Copics
Pearl - Kaisercraft
Sentiment See D's

Friday Sketchers Challenge

Good Afternoon all hope you are well. Here is a card i made for this weeks Friday sketchers challenge. I really enjoyed the sketch this week it meant i could make a different shaped card which is always nice.


Here is the sketch i followed.

And this is my interpretation - I used my new papers from Forever friends (santas on his way) and an image from Pollycraft designs.

Here is a close up of the image - she is so sweet i can see her being used on a lot more christmas cards from now.


Card Recipie
Papers - Basic Gray forever friends
Image - Pollycraft
Brads - Papermania
Pearls - Kaisercraft
Sentiment - Woodware
 

Friday, October 9, 2009

Entry to Sketch Saturday and another Christmas card

Afternoon ladies hope you are all well and looking forward to your weekends - I know I am I have a weekend of crafting planned - pure heaven :D I made this card following this weeks Sketch Saturday Sketch, there was also the challenge of adding some sort of animal theme to your card. I have used the Birds and Swirls Cuttlebug folder for my card I hope that counts.

This is a smaller and ocmpletley different shape card for me - if you have seen many of my cards you will know i usually make Square cards but i fancied a change. The papers are from Papertrey and were very kindly sent to me by Steph in a recent card kit I won.
Card Recipie
Papers - Papertray and card from stash
Image - Magnolia
Sentiment - See D's
Snowflakes made using a punch
Cuttlebug folder - Birds and swirls
Coloured using copics


Thursday, October 8, 2009

Another Christmas card for Woodgreen

Afternoon All, here is another Christmas card I made for Woodgreen. It is a complete CASE of Stephs card which an be found here  - I won the card kit for this one so sat down and made it last night. I am now completley in Love with this image which is from High hopes so as soon as Pay day hurries up and arrives I am off to buy it.

I can't actually do a card recipie for this one apart from to say that i coloured the Image with Copics and Steph sent the rest :)
Please don't forget to check out my Blog candy Here - I really need as many cards as I can get for this appeal so for every 20 proper entries (with all rules followed) I will add something else. 

A Birthday card and entry to Papertake Weekly

Well I am finally getting over my cold - still feeling really run down and rubbish but much better than I was. I made this card last night in a hurry as I had completley forgotten I needed one. I used the sketch from Papertake weekly which I am in love with and have saved for some of my Christmas cards :)


I made this card using some gorgeous new papers i bought over the weekend they are sooooo versatile and are double sided which is always great (although I do feel bad sticking tape all over one pretty side). The image is a Victoria Case one - I just love this image it is perfect for mens cards i am going to get some christmassy ones from there too so I can get those sorted :)

Card Recipe
Papers - Forever Friends
Sentiment - Woodware
Image - Victoria Case Digital Image
Ribbon - From Stash 

Please don't forget to check out my Blog candy Here - I really need as many cards as I can get for this appeal so for every 20 proper entries (with all rules followed) I will add something else. 

Sunday, October 4, 2009

A Tag -Just because

I decided to buy my husband a mint Aero the other day so thought i might make a tag for it hee hee i know any excuse - what do you think?


Some Christmas cards for Woodgreen

Hello all - here are some christmas cards I made today to go towards my woodgreen appeal. I would also like to say a massive thank you to Stephanie from Stamping and sharing who sent me a whopping TEN cards for woodgreen incredible so THANK YOU. For those of you who are interested in entering in for some blog candy and also helping a great cause please see my woodgreen post at the top of my blog for details on how to enter.


You can't see it very well on this picture so here is a close up of one of the cards. I made these using the christmas tree cuttlebug folder and embelished the trees with little gems. These are very simple cards but I think that sometimes that makes a great card.


I am entering these cards in to the Creative inspirations challenge which was to use wording or numbers on your card.

Card recipe
Paper - Forever friends 
Image - Cuttlebug Christmas tree folder
Sentiment - Dovecraft
Ribbon - From stash
Gems - from stash

Entry to Mojo Monday

I told you I had been busy - here is a card I made for my sister to give to her boyfriend for his birthday - I made a photo frame to match but i forgot to take a picture of it Grrrrrrr. I followed the Sketch on Mojo Monday for this one. Again I have used an image from Mo Manning - You cant go wrong with these she has something for every occasion. 


Here is a close up of the image coloured with copics.


Card Recipe
Image - Mo Manning 
Papers - Basic Gray and some from Stash
Sentiment - Woodware
Ribbon from Stash

Secret Crafter Saturday Challenge

Hello everyone - I haven't blogged in a while I have been busy making things though. Yesterday me and my friend Fiona went to a crafting event at Huntingdon Garden and leisure where there were demonstrations of loads of different products and techniques. I saw this slider card design there and asked how to make one. I have seen these before but have never seen instructions it was surprisingly easy to make - i think next time i make one i will write some instructions for it. They are great for putting in gift vouchers for Christmas and birthdays. I have made this one for my husband, I got him a gift voucher for his Birthday (Also took him out for a meal last night) hope he likes it.

Both me and Fi sat making these and even had the meal moved back an hour so we could craft some more Ha-ha good job we have understanding partners really :)


Above is the card when it is closed I love the image on the front - it is by Mo Maurie Manning I thought it was great for this type of card as you have to figure out how to get in to it it isn't like a normal card.


Here is a close up of the main image coloured with copic markers as always :) 
Card Recipe
Papers - Forever friends Gift wrapped
Main Image - Mo Maurie Manning
Misc - Copics, Dovecraft mini brads, ribbon from stash, 
Sentiments - Woodware and See D's